How to install floor lawn lights?
Leave a message
Installing floor lawn lights can transform your outdoor space, adding both functionality and aesthetic appeal. As a trusted floor lawn lights supplier, I'm here to guide you through the process step by step. Whether you're looking to illuminate a pathway, highlight a garden feature, or create a cozy ambiance in your yard, these lights are a great addition.
Planning Your Installation
Before you start digging and wiring, it's crucial to plan your installation carefully. Here are some key steps to consider:
1. Determine Your Lighting Needs
Think about the purpose of your lawn lights. Are you looking to provide safety and visibility on a pathway, or do you want to create a decorative effect in your garden? Consider the areas you want to illuminate and the level of brightness required. For example, pathways may need brighter lights for safety, while decorative areas can benefit from softer, more ambient lighting.
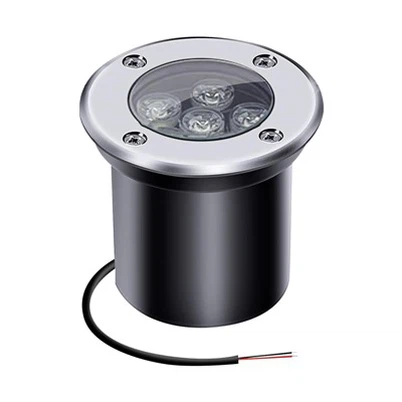
2. Choose the Right Lights
As a floor lawn lights supplier, we offer a wide range of products to suit different needs and styles. Some popular options include Led Landscape Lawn Light, which are versatile and can be used to highlight plants, trees, or architectural features. Led Lawn Bollard Lights are great for lining pathways and providing a more substantial source of light. And if you're looking for an eco-friendly option, our Solar Cat-claw Lamp is a unique and energy-efficient choice.
3. Create a Layout
Once you've chosen your lights, create a layout plan for your installation. Use a garden hose or string to mark the locations of the lights on the ground. This will help you visualize the final look and ensure that the lights are evenly spaced and properly aligned. Consider the height and spread of the lights, as well as the distance between them, to achieve the desired effect.
Preparing the Site
Before you start installing the lights, you need to prepare the site. Here's what you need to do:
1. Clear the Area
Remove any debris, rocks, or vegetation from the areas where you'll be installing the lights. This will make it easier to dig the holes and ensure that the lights are installed securely.
2. Mark the Locations
Use a stake or marker to mark the exact locations of the lights on the ground, based on your layout plan. This will help you stay on track during the installation process.
3. Dig the Holes
Using a shovel or post-hole digger, dig holes for the lights at the marked locations. The depth and diameter of the holes will depend on the type of lights you're installing. Make sure the holes are deep enough to accommodate the lights and any wiring or mounting hardware.
Installing the Lights
Now that the site is prepared, it's time to install the lights. Here's a general guide on how to do it:
1. Assemble the Lights
If your lights require assembly, follow the manufacturer's instructions carefully. This may involve attaching the light fixtures to the stakes or mounting brackets, connecting the wiring, and installing any bulbs or batteries.
2. Place the Lights in the Holes
Carefully place the lights in the holes, making sure they are level and upright. If necessary, use a level to check the alignment.
3. Connect the Wiring
If you're installing wired lights, connect the wiring according to the manufacturer's instructions. Make sure the connections are secure and insulated to prevent any electrical hazards. If you're installing solar lights, simply place them in a location where they will receive plenty of sunlight during the day.
4. Backfill the Holes
Once the lights are in place and the wiring is connected, backfill the holes with soil or gravel. Pack the soil or gravel firmly around the lights to ensure they are stable.
Testing the Lights
After the lights are installed, it's important to test them to make sure they are working properly. Here's how to do it:
1. Check the Connections
Before turning on the lights, double-check all the wiring connections to make sure they are secure. Look for any loose wires or exposed connections that could cause a short circuit.
2. Turn on the Power
If you're installing wired lights, turn on the power at the breaker box or switch. If you're installing solar lights, make sure they are receiving sunlight and the batteries are charged.
3. Test the Lights
Once the power is on, test the lights to make sure they are working properly. Check each light individually to ensure that it is shining brightly and evenly. If any lights are not working, check the wiring connections and bulbs to troubleshoot the problem.
Maintaining Your Lights
To keep your floor lawn lights looking and working their best, it's important to maintain them regularly. Here are some tips on how to do it:
1. Clean the Lights
Periodically clean the lights to remove any dirt, debris, or cobwebs. Use a soft cloth or brush to gently wipe the light fixtures and lenses. This will help keep the lights shining brightly and prevent any buildup that could affect their performance.
2. Check the Wiring
Regularly inspect the wiring for any signs of damage or wear. Look for frayed wires, loose connections, or exposed insulation. If you notice any problems, repair or replace the wiring immediately to prevent any electrical hazards.
3. Replace the Bulbs
If your lights use bulbs, replace them as needed. Over time, bulbs can burn out or lose their brightness. Make sure to use the correct type and wattage of bulbs recommended by the manufacturer.


4. Protect the Lights from the Elements
During extreme weather conditions, such as heavy rain, snow, or high winds, take steps to protect your lights from damage. You may want to cover the lights with a waterproof tarp or move them indoors if necessary.
Conclusion
Installing floor lawn lights is a great way to enhance the beauty and functionality of your outdoor space. By following these steps and using high-quality lights from a trusted supplier, you can create a stunning lighting display that will impress your guests and make your yard more enjoyable. If you have any questions or need further assistance with your installation, please don't hesitate to contact us. We're here to help you every step of the way. Whether you're a DIY enthusiast or a professional landscaper, we have the products and expertise to meet your needs. Contact us today to discuss your lighting project and start creating the outdoor space of your dreams.
References
- Manufacturer's instructions for floor lawn lights
- General knowledge of outdoor lighting installation and maintenance